

API-REST CALLS
[bws_pdfprint display=’pdf’]
Centribal Platform will allow us to use external APIs to request information and be able to return it to the user in the chatbot.
Among the use cases that we currently have, we can request information or status of product shipments, information relevant to a reference or stock of products, among others.
This helps the chatbot to have a dynamic ability to provide relevant information and not just a conversational flow.
For now we are limited to one-way requests, but we will be able to make two-way requests in the future as new features are developed.
In order to use the API calls, it is necessary to know a little about the lexicon that we will use.
As a first concept we need to know how to generate the variables that the user will complete when responding to the chatbot.
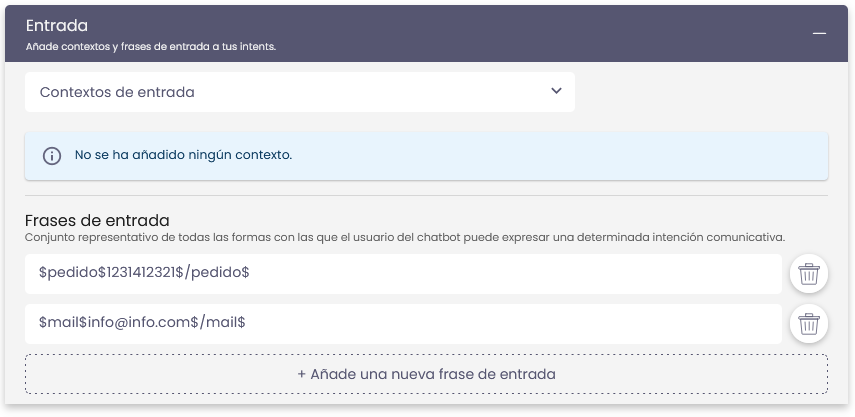
In the Input module, to generate variables we will use the following format:
$variable$this is a text$/variable$
We use $ $ as the opening brace and $/ $ as the closing brace.
The text in blue will be what changes to name the variable we are using, it can be, name, ID, email, reference, that is, any identifying word.
In the significant text we can place any text, which will not affect the training or the result at all since it is only a placeholder.
Mainly, variations of how the user can indicate the data we request must be trained, as in the example on the right.
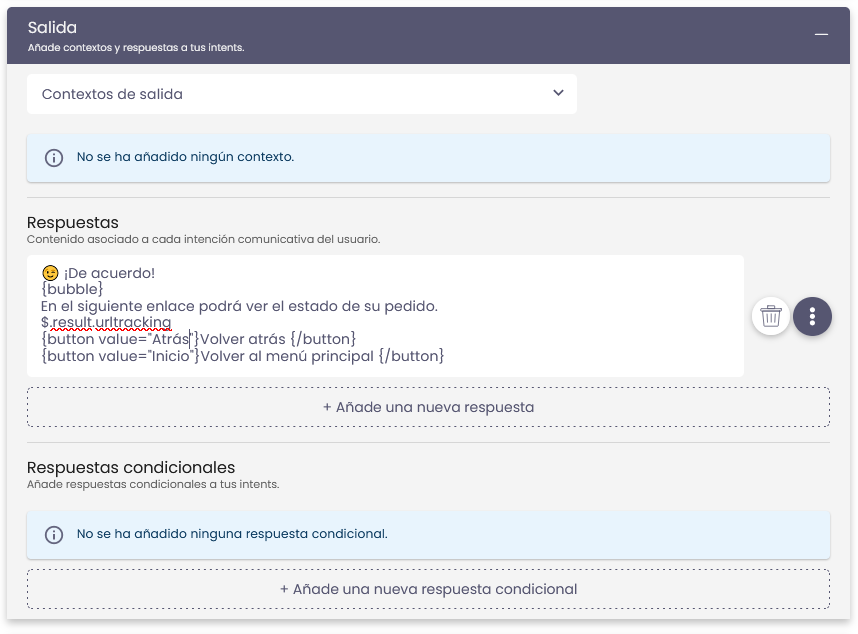
In the output module we can show the variables in the response to the user, for this, we will have several ways to call these variables.
If the variable is declared in the same intent of the response, we will use:
$variable
If the variable is declared in another intent but we want to return the response of that variable outside of it, it will be necessary to use the contexts declared in those intents to fetch the response. In that case we will use:
#context.variable
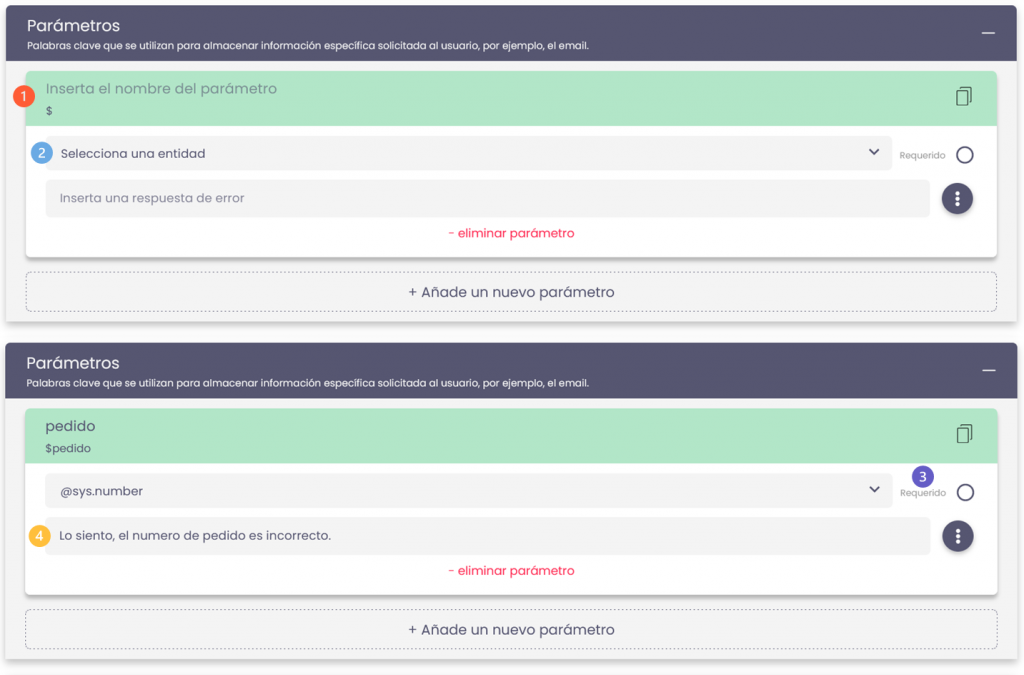
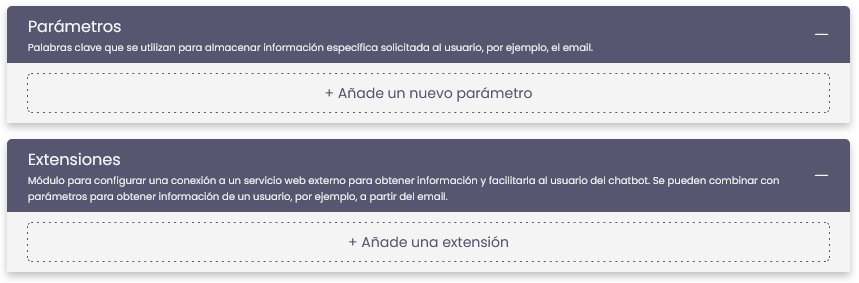
In the parameters module, it will be where we are going to configure each variable. We will have the following fields::
Name and variable:
1. We define the name and the variable will be autocompleted with the symbol $.
Entity type:
2. We define the category of the variable for which the chatbot can correctly interpret the variable (number, text, date, location or custom).
Required or not required:
3. Definiremos si es obligatoria que esta variable sea respondida por el usuario para que se valide y dé la respuesta correcta.
Prompt text:
4. If we mark the variable as required, it will be necessary to indicate a text that requests the required data.
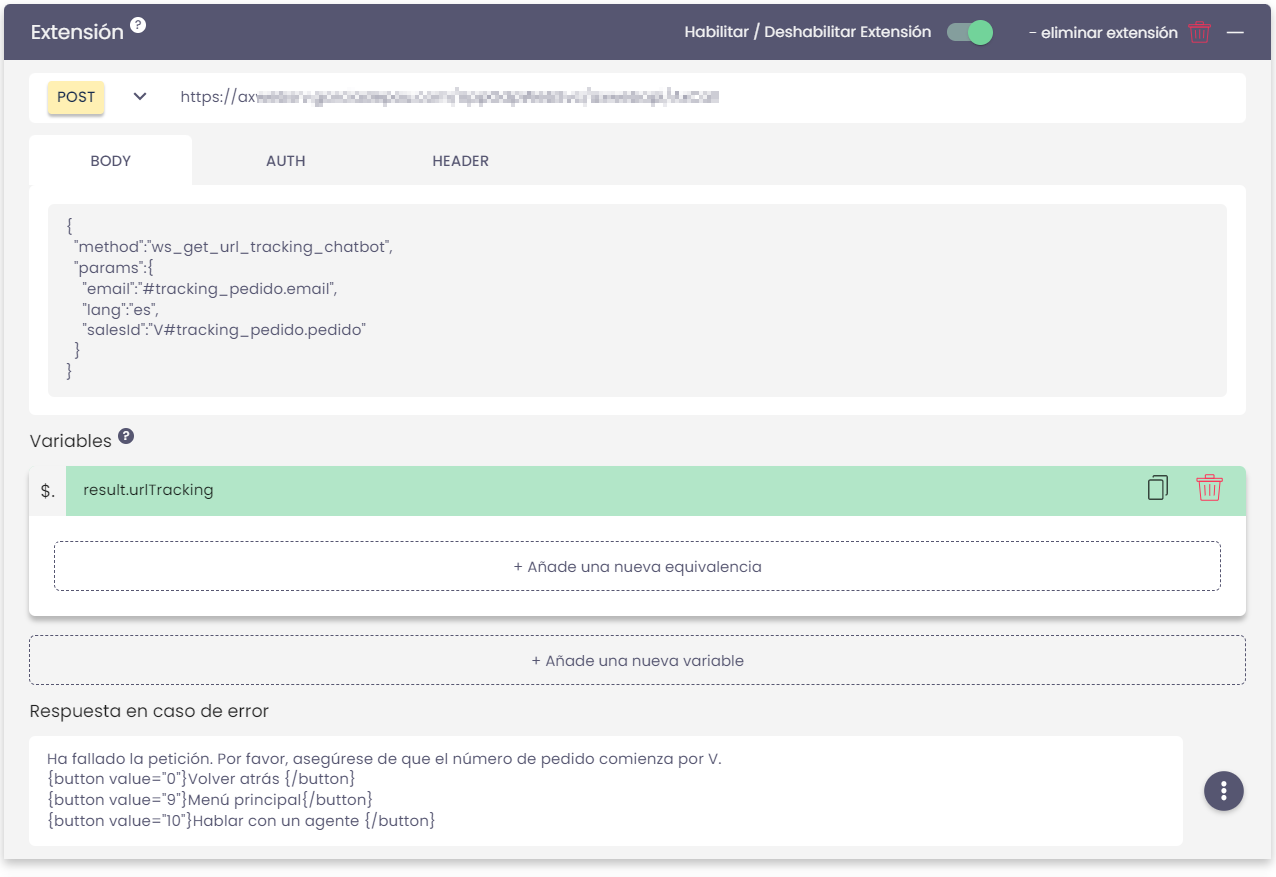
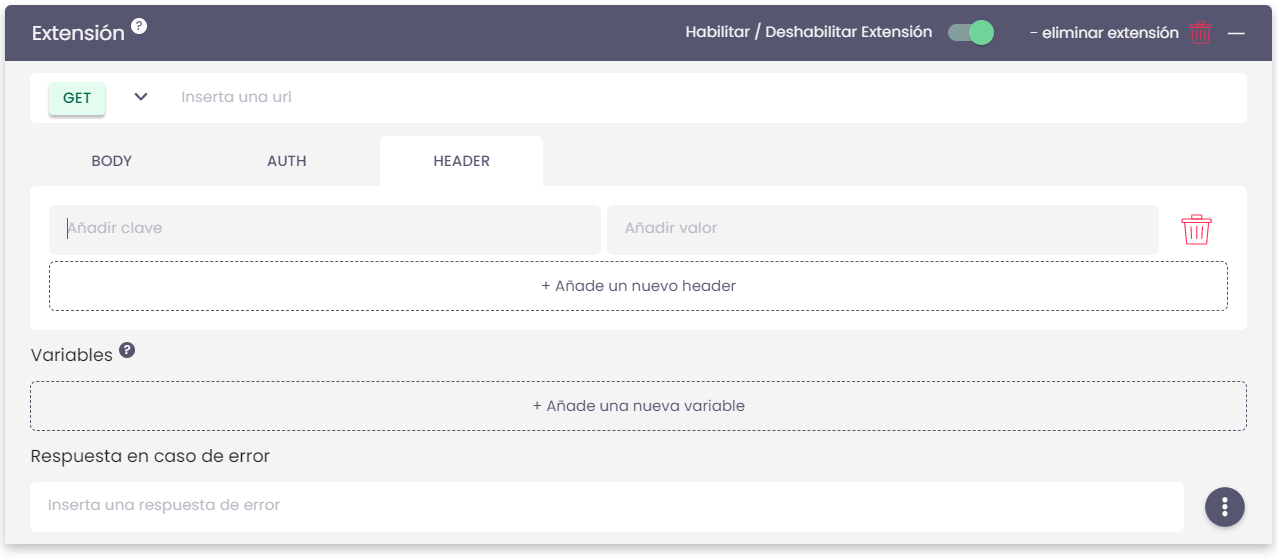
In the extension module we will have as the first configurable, a drop-down to select the type of request (GET, PUT, POST, DELETE) and the API link.
Then we will have three tabs to finish configuring our extension:
- BODY: where we will write the body in JSON format that will bring the information from the web service.
- AUTH: where we can select what type of authentication we will do in the extension (See examples below*).
- HEADER: where we can configure the header of the web service if necessary.
We can also declare variables in the extension that appears in the response.
In the example, we see that the variable that we want to give in the response of the intent will have the following format:
$.result.urltracking
Note that we have a point after the $ sign, this indicates that it is an extension variable and it is necessary to be able to transfer the returned data that the API will respond to, in the bot’s conversation.
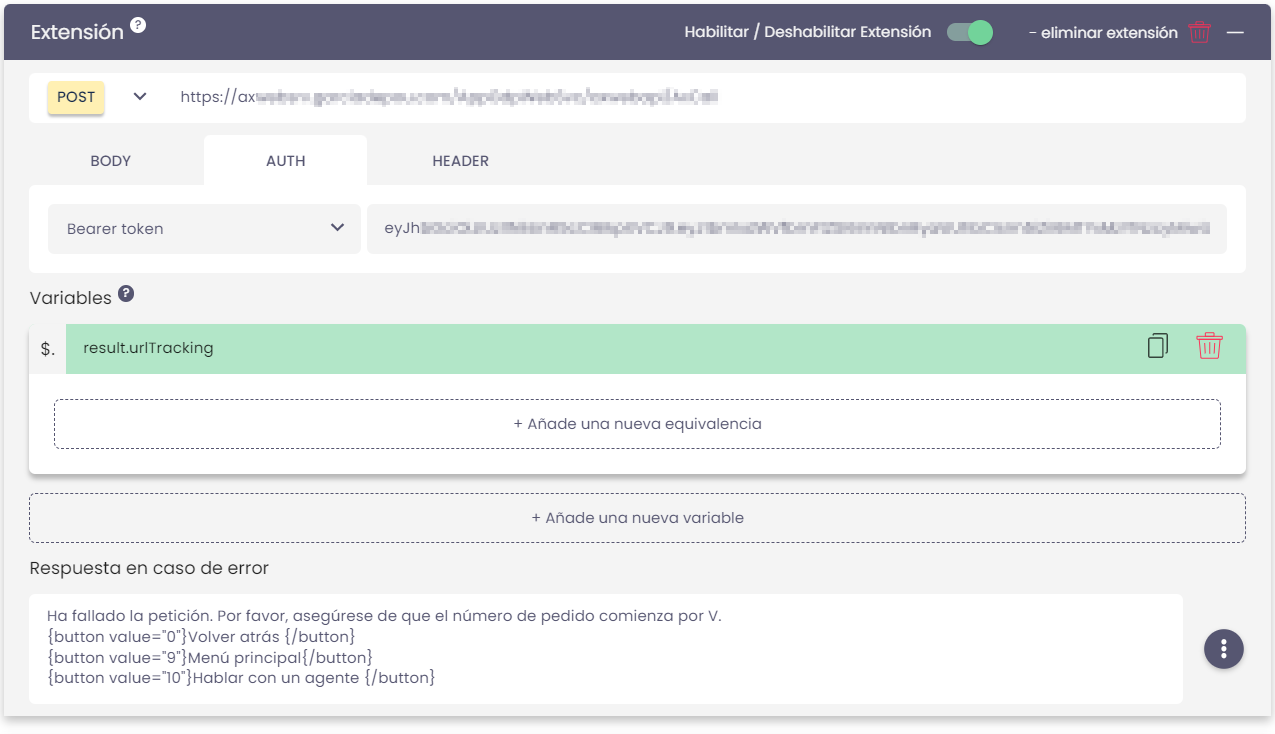
Authentication Methods
- No authentication, or no security keys.

- With token or key to authenticate.

- With basic user and password authentication.

- With JSON Web Token or key to authenticate using JSON parameters. This method will be used for those security tokens that expire from time to time. A second URL will be configured which will contain a non-visible and automatically generated security token to be able to give access to the extension. The header key and prefix must be configured. If the JWT has a post method, the body must be configured.
